Jupiter Notebook Tips & Tricks
Importing functions from another jupyter notebook
The nbimporter module helps us here:
For example, with two notebooks in this directory structure:
/src/configuration_nb.ipynb
analysis.ipynb
/src/configuration_nb.ipynb:
analysis.ipynb:
output:
We can also import and use modules from python files.
/src/configuration.py
analysis.ipynb:
output:
ipynb import another ipynb file
1. Executing Shell Commands
The notebook is the new shell
The shell is a way to interact textually with the computer. The most popularUnix shell is Bash(Bourne Again SHell ). Bash is the default shell on most modern implementations of Unix and in most packages that provide Unix-like tools for Windows.
Now, when we work with any Python interpreter, we need to regularly switch between the shell and the IDLE, in case we need to use the command line tools. However, the Jupyter Notebook gives us the ease to execute shell commands from within the notebook by placing an extra !before the commands. Any command that works at the command-line can be used in IPython by prefixing it with the ! character.
We can even pass values to and from the shell as follows:
Notice, the data type of the returned results is not a list.
2. Jupyter Themes
Theme-ify your Jupyter Notebooks!
If you are a person who gets bored while staring at the white background of the Jupyter notebook, themes are just for you. The themes also enhance the presentation of the code. You can find more about Jupyter themes here. Let’s get to the working part.
Installation
List of available themes
Currently, the available themes are chesterish, grade3, gruvboxd, gruvboxl monokai, oceans16, onedork, solarizedd ,solarizedl.
You will have to reload the jupyter notebook everytime you change the theme, to see the effect take place.
The same commands can also be run from within the Jupyter Notebook by placing ‘
!’ before the command.
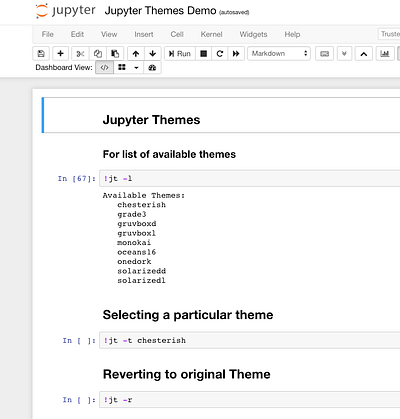
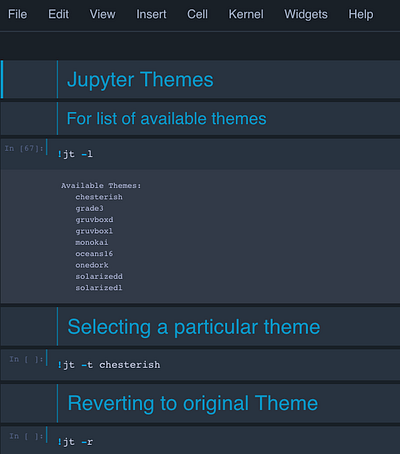

Left: original | Middle: Chesterish Theme | Right: solarizedl theme

3. Notebook Extensions
Extend the possibilities
Notebook extensions let you move beyond the general vanilla way of using the Jupyter Notebooks. Notebook extensions (or nbextensions) are JavaScript modules that you can load on most of the views in your Notebook’s frontend. These extensions modify the user experience and interface.
Installation
Installation with conda:
Or with pip:
Start a Jupyter notebook now, and you should be able to see an NBextensions Tab with a lot of options. Click the ones you want and see the magic happen.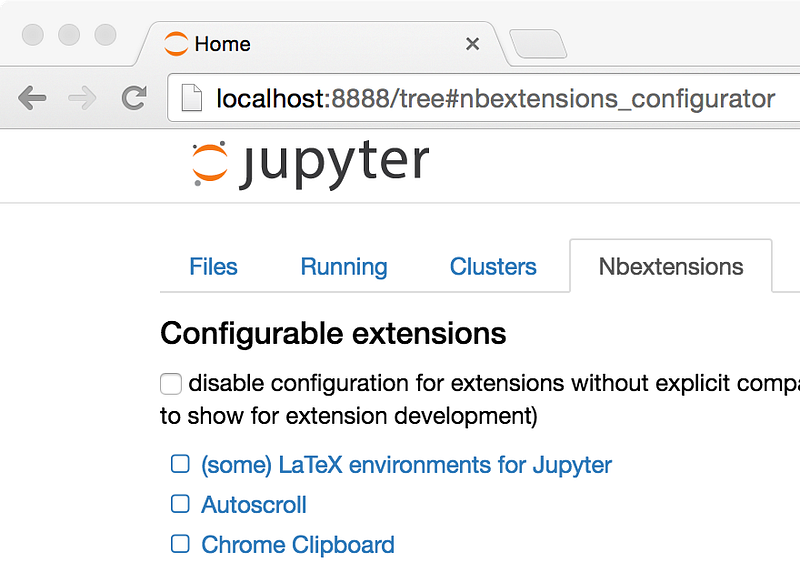
In case you couldn’t find the tab, a second small nbextension, can be located under the menuEdit.
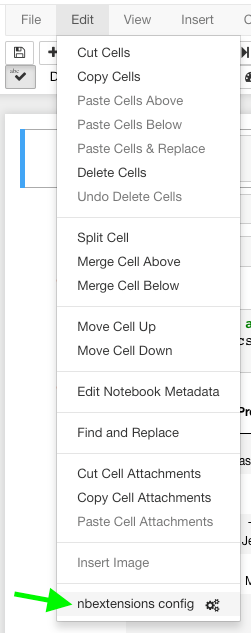
Let us discuss some of the useful extensions.
1. Hinterland
Hinterland enables code autocompletion menu for every keypress in a code cell, instead of only calling it with the tab. This makes Jupyter notebook’s autocompletion behave like other popular IDEs such as PyCharm.
2. Snippets
This extension adds a drop-down menu to the Notebook toolbar that allows easy insertion of code snippet cells into the current notebook.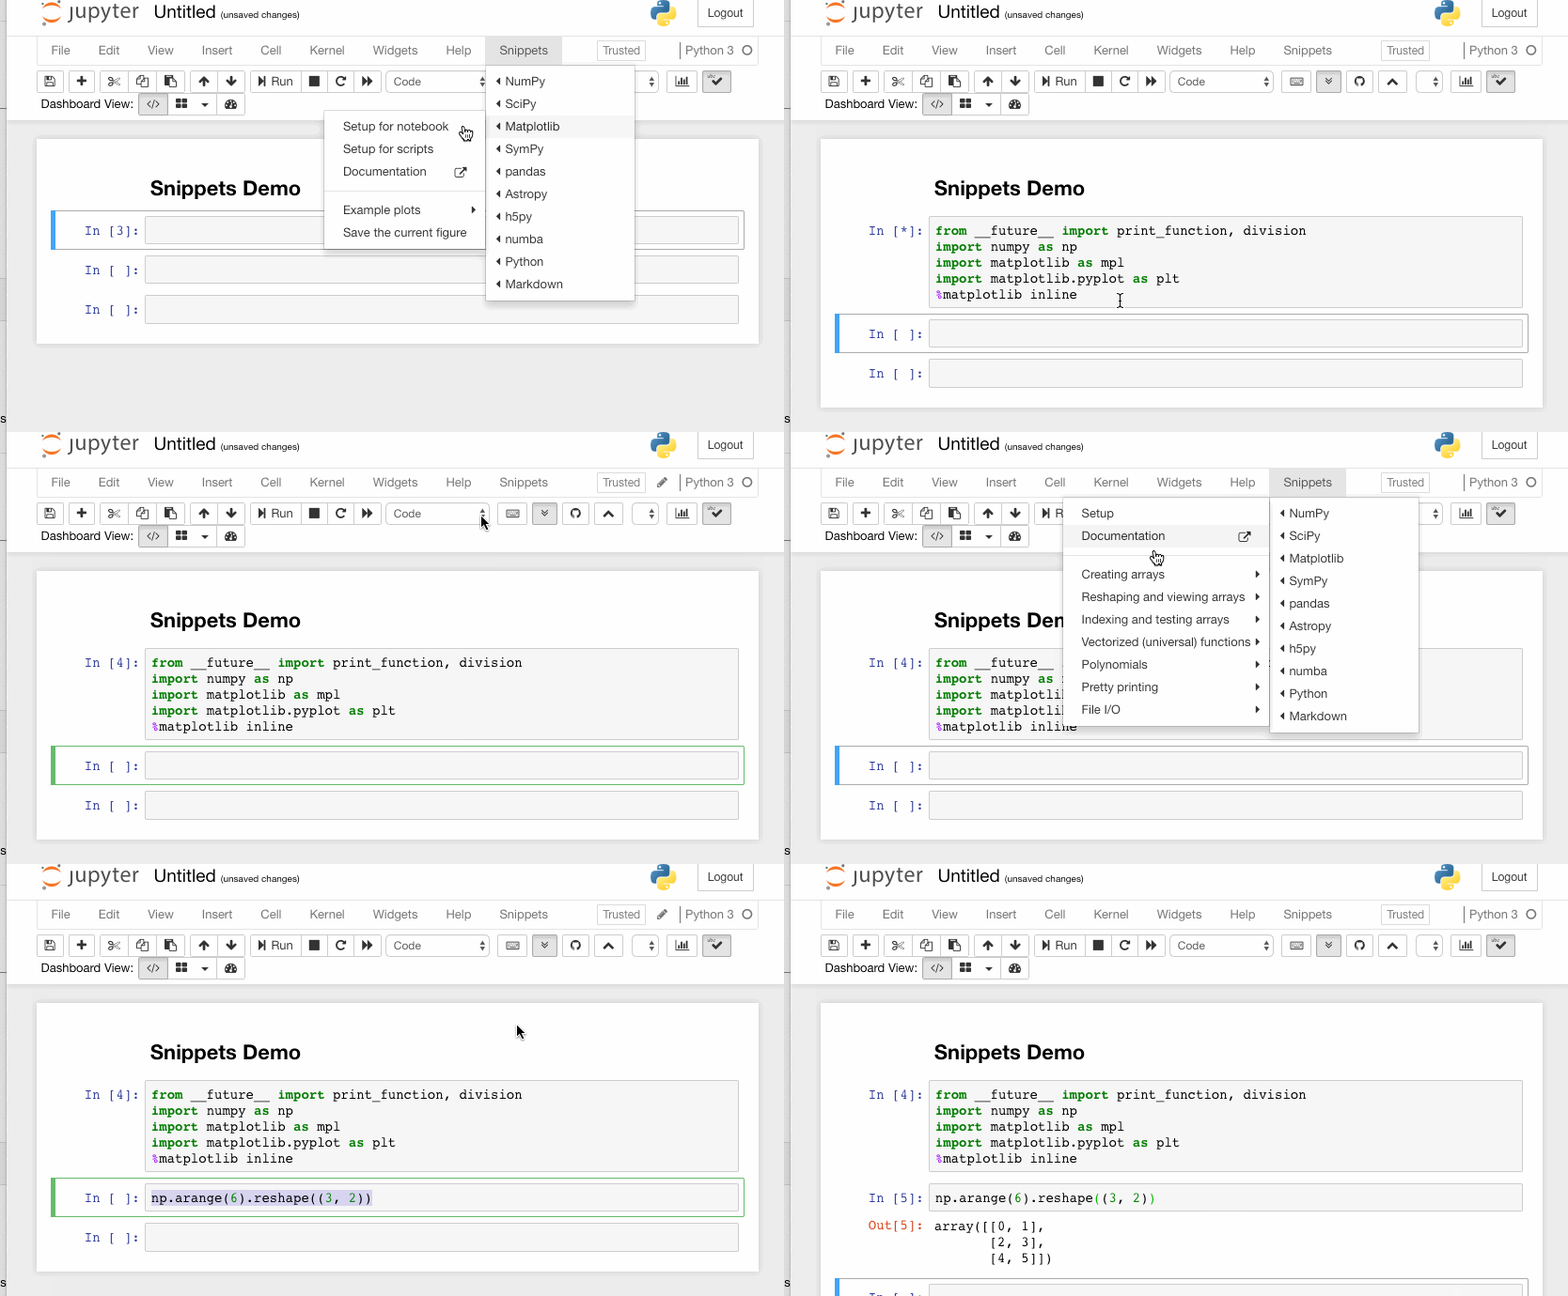
3. Split Cells Notebook
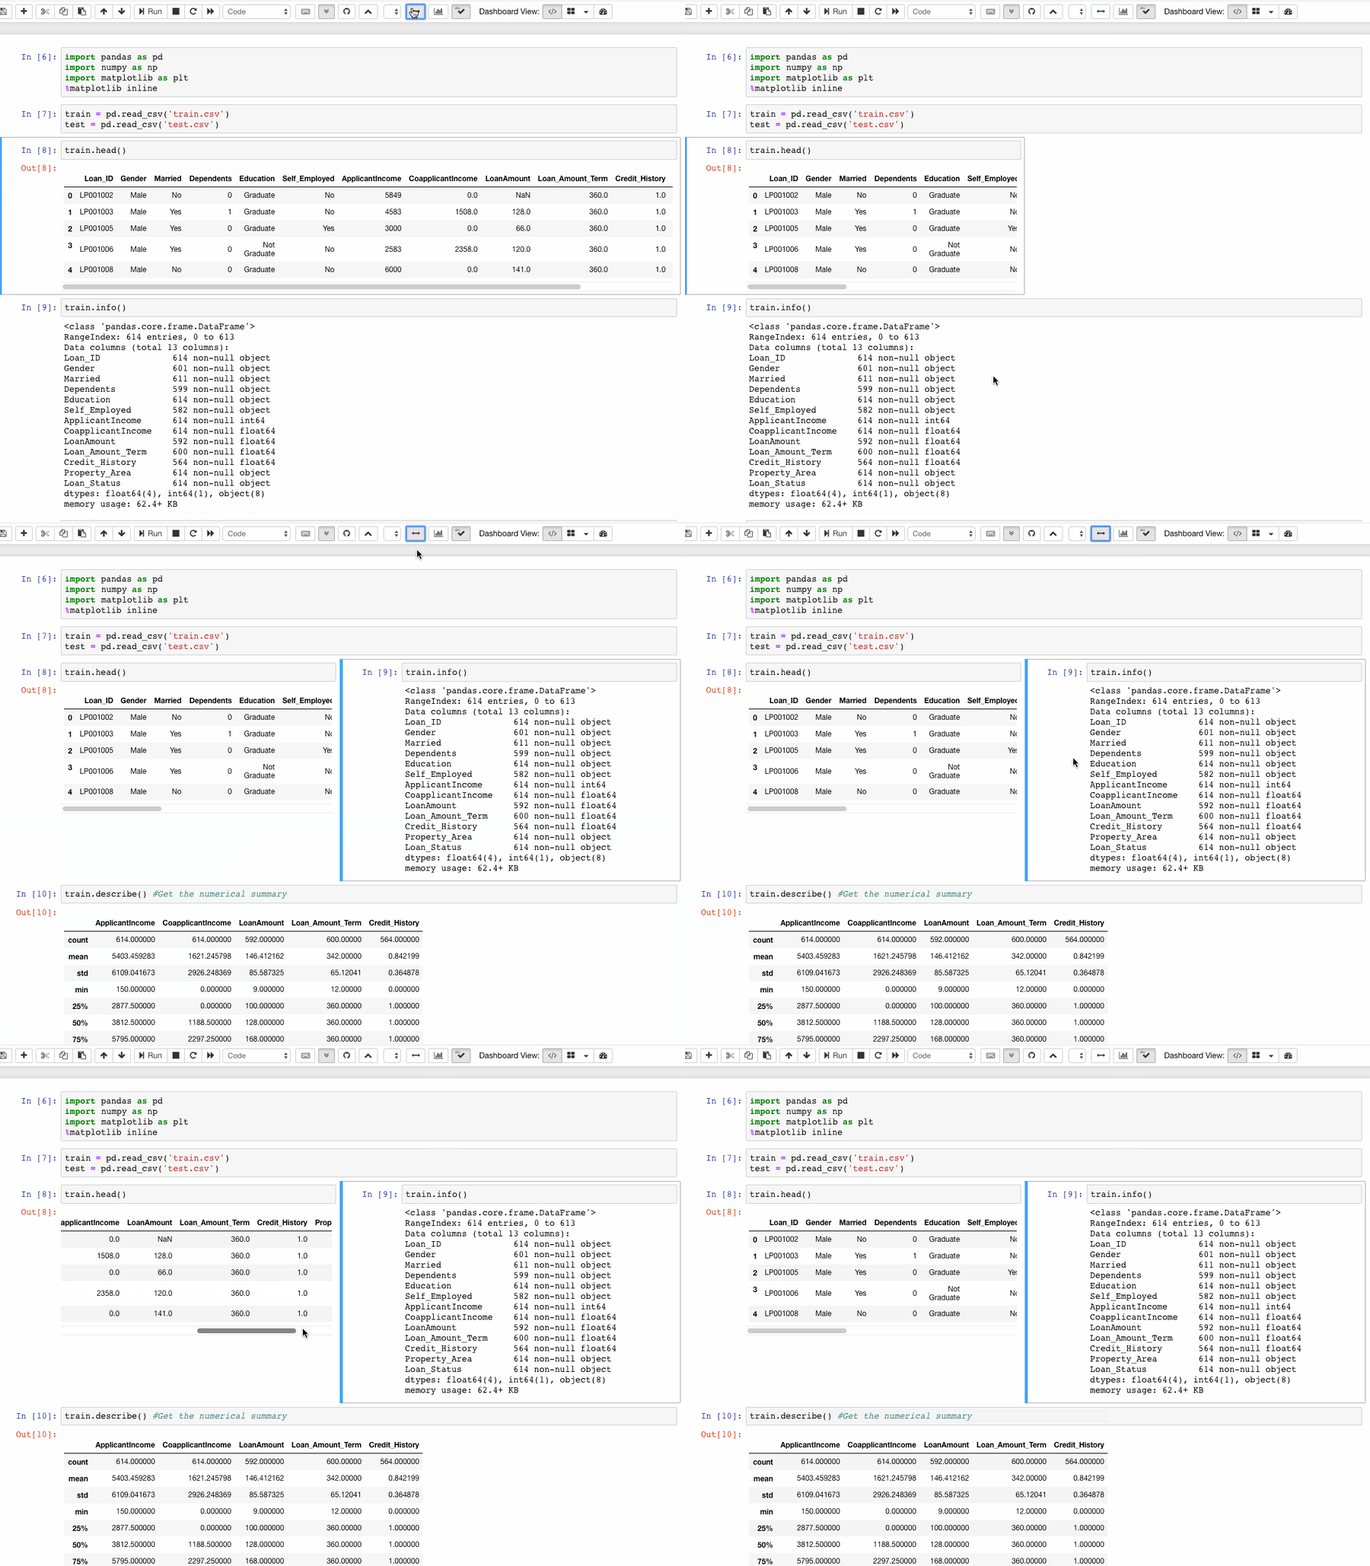
This extension splits the cells of the notebook and places then adjacent to each other.
4. Table of Contents
This extension enables to collect all running headers and display them in a floating window, as a sidebar or with a navigation menu. The extension is also draggable, resizable, collapsible and dockable.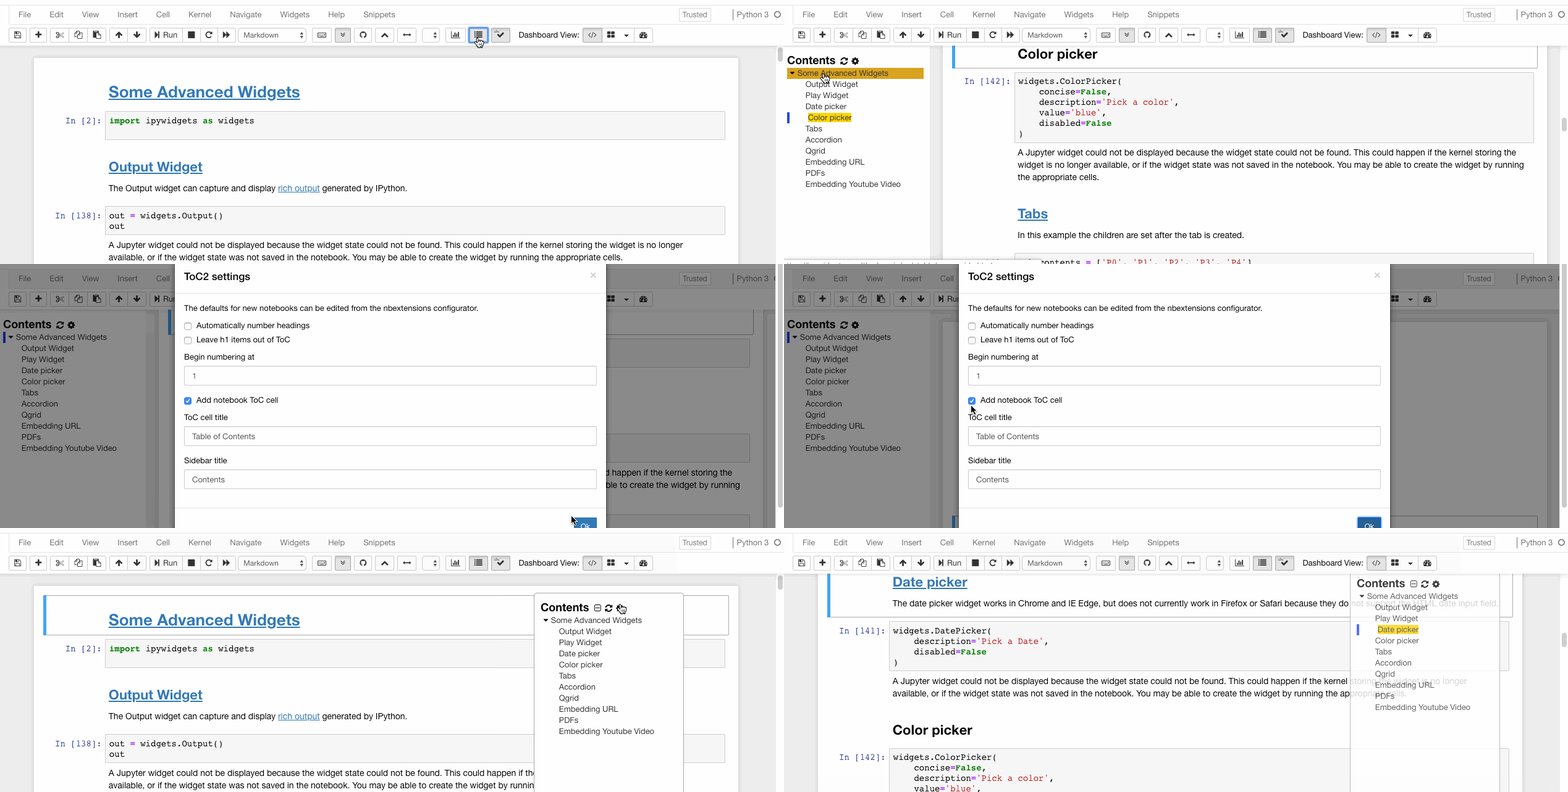
5. Collapsible Headings
Collapsible Headings allows the notebook to have collapsible sections, separated by headings. So in case you have a lot of dirty code in your notebook, you can simply collapse it to avoid scrolling it again and again.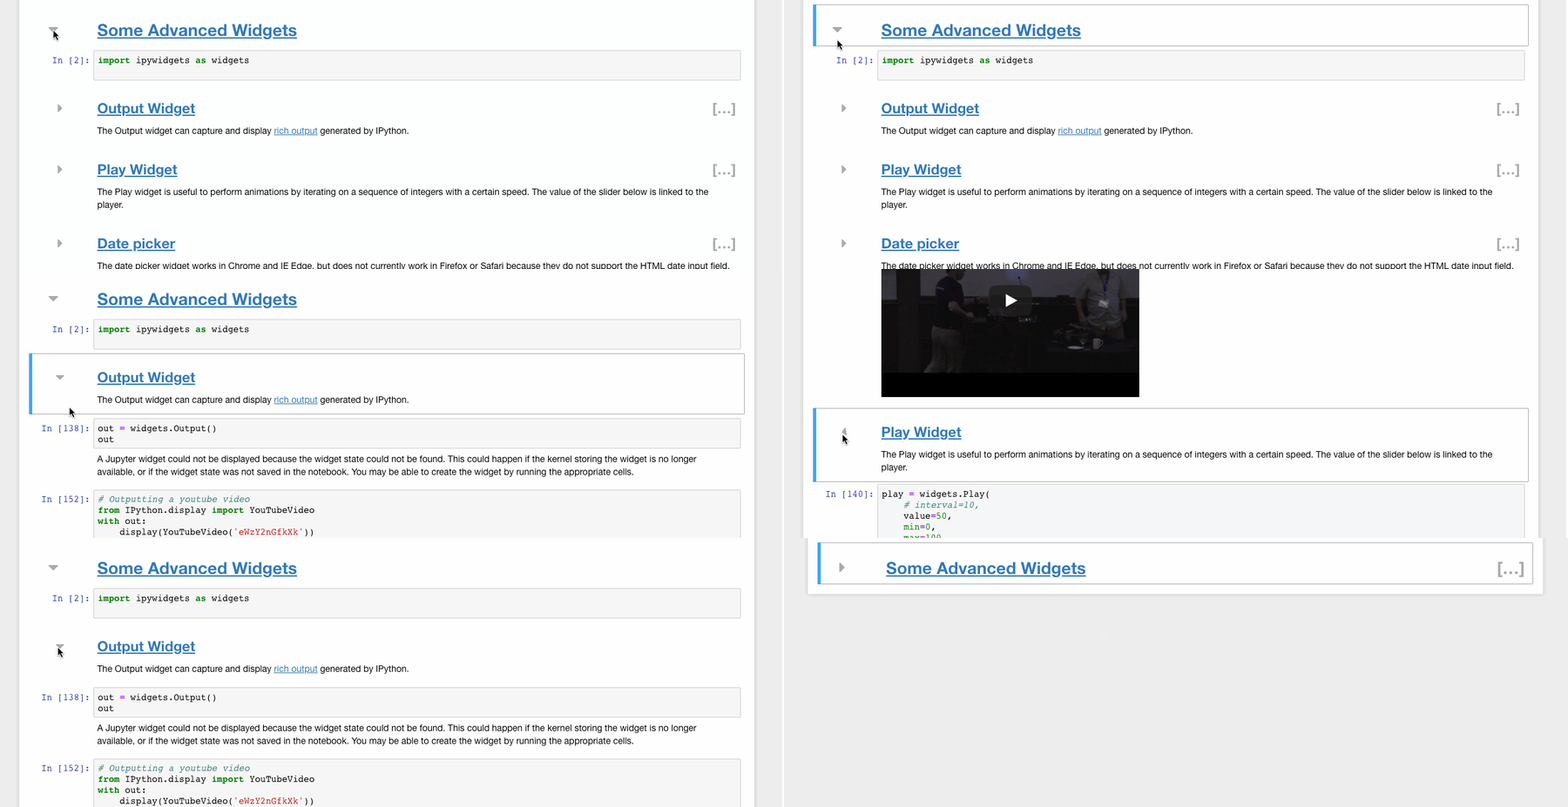
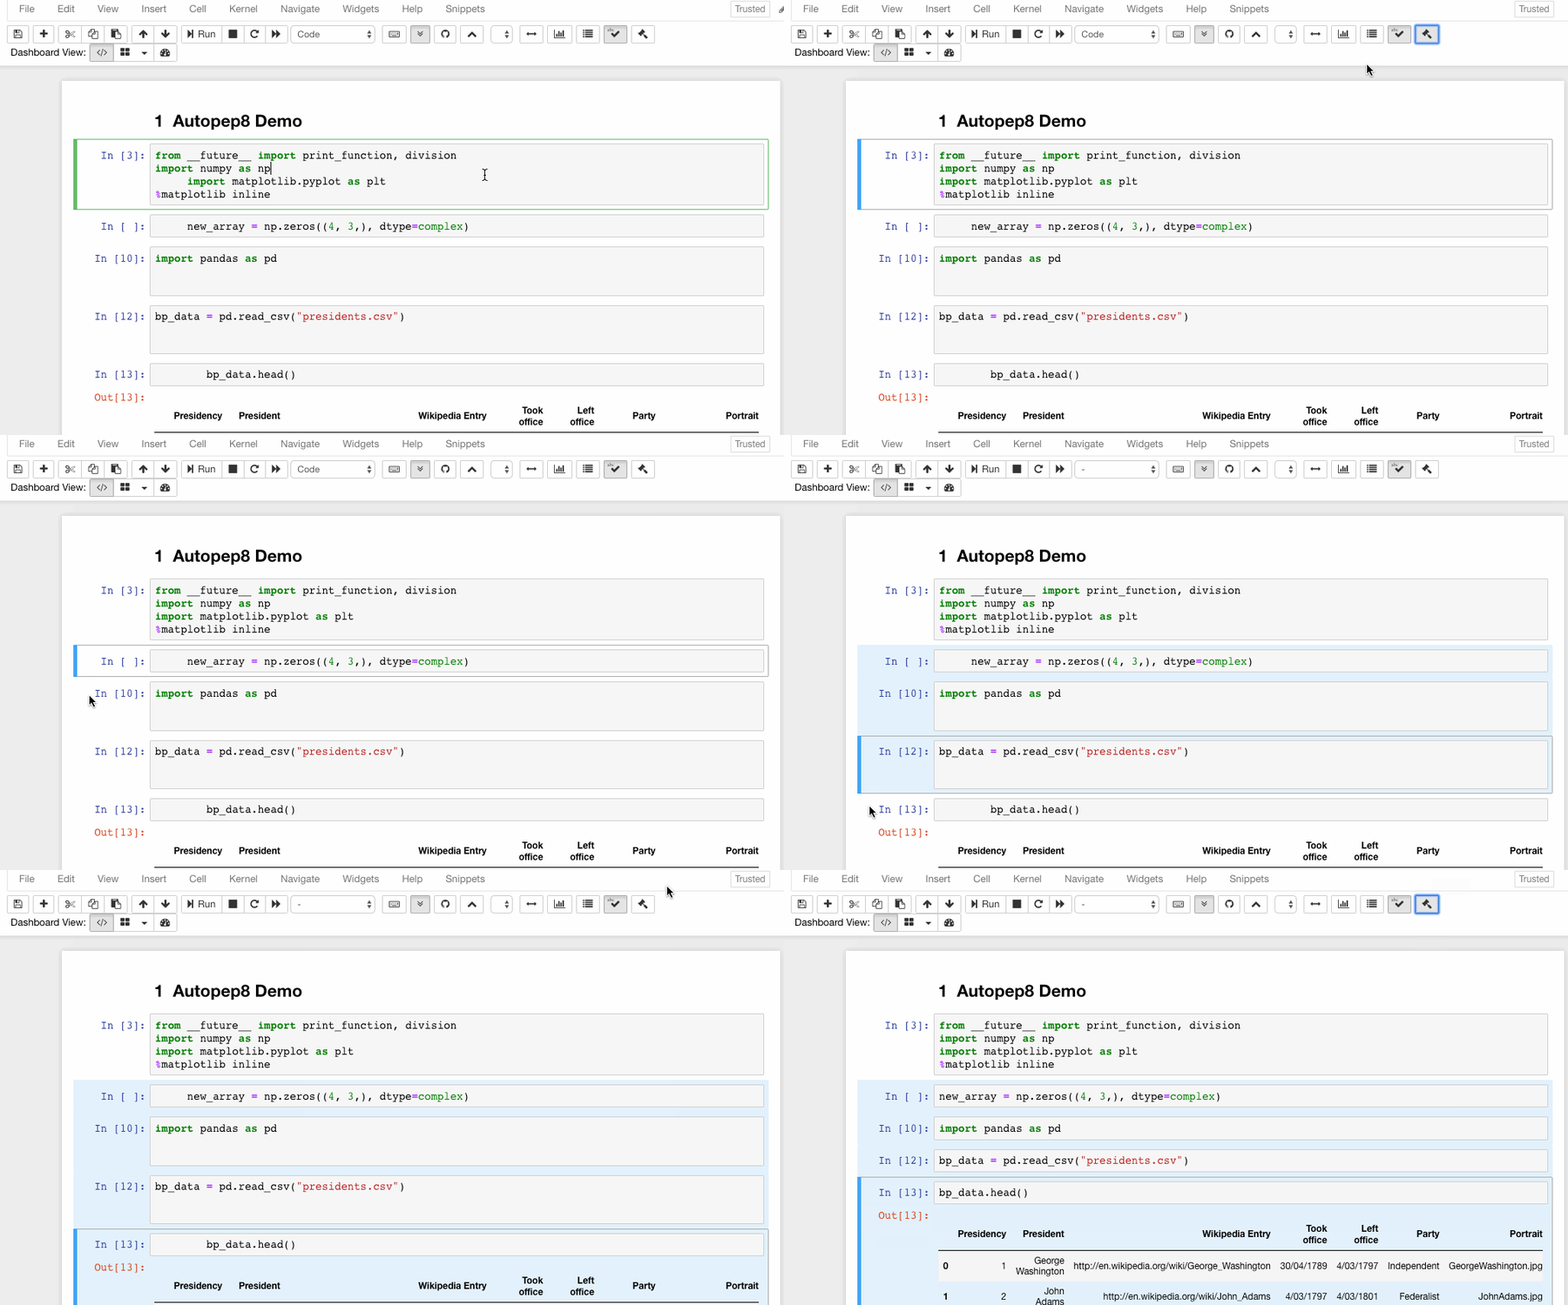
6. Autopep8
Autopep8 helps to reformat/prettify the contents of code cells with just a click. If you are tired of hitting the spacebar again and again to format the code, autopep8 is your savior.
4. Jupyter Widgets
Make notebooks interactive
Widgets are eventful python objects that have a representation in the browser, often as a control like a slider, textbox, etc. Widgets can be used to build interactive GUIs for the notebooks.
Installation
Let us have a look at some of the widgets. For complete details, you can visit their Github repository.
Interact
The interact function (ipywidgets.interact) automatically creates a user interface (UI) controls for exploring code and data interactively. It is the easiest way to get started using IPython's widgets.
1. Basic Widgets


2. Advanced Widgets
Here is a list of some of the useful advanced widgets.
Play Widget
The Play widget is useful to perform animations by iterating on a sequence of integers at a certain speed. The value of the slider below is linked to the player.

Date picker
The date picker widget works in Chrome and IE Edge but does not currently work in Firefox or Safari because they do not support the HTML date input field.

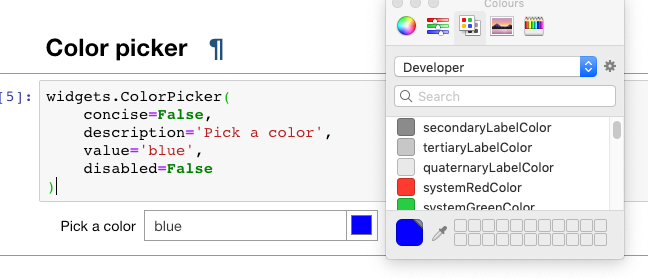
Color picker
Tabs

5. Qgrid
Make Data frames intuitive
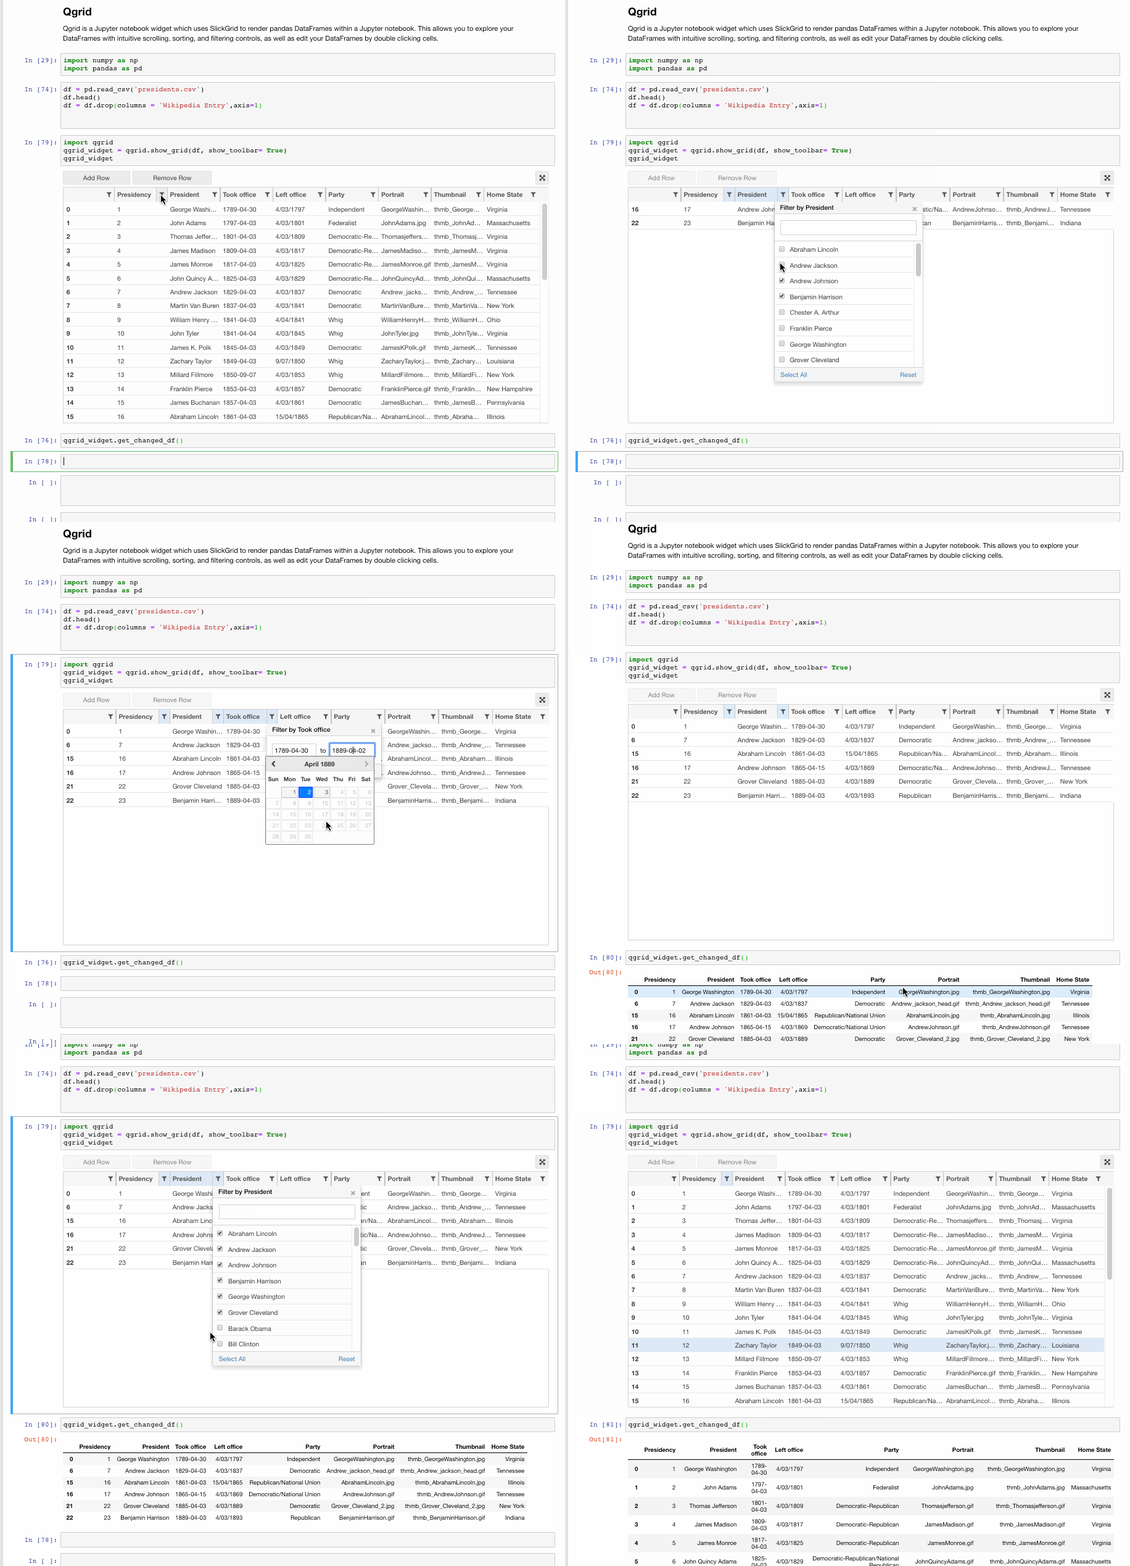
Qgrid is also a Jupyter notebook widget but mainly focussed at dataframes. It uses SlickGrid to render pandas DataFrames within a Jupyter notebook. This allows you to explore your DataFrames with intuitive scrolling, sorting and filtering controls, as well as edit your DataFrames by double-clicking cells. The Github Repository contains more details and examples.
Installation
Installing with pip:
Installing with conda:
6. Slideshow
Code is great when communicated.
Notebooks are an effective tool for teaching and writing explainable codes. However, when we want to present our work either we display our entire notebook(with all the codes) or we take the help of powerpoint. Not any more. Jupyter Notebooks can be easily converted to slides and we can easily choose what to show and what to hide from the notebooks.
There are two ways to convert the notebooks into slides:
1. Jupyter Notebook’s built-in Slide option
Open a new notebook and navigate to View → Cell Toolbar → Slideshow. A light grey bar appears on top of each cell, and you can customize the slides.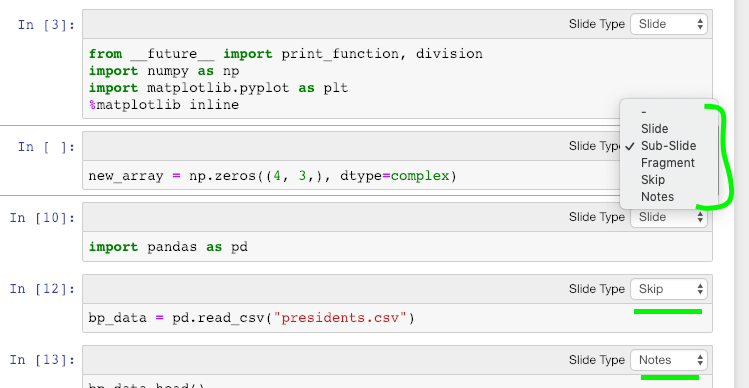
Now go to the directory where the notebook is present and enter the following code:
The slides get displayed at port 8000. Also, a .html file will be generated in the directory, and you can also access the slides from there.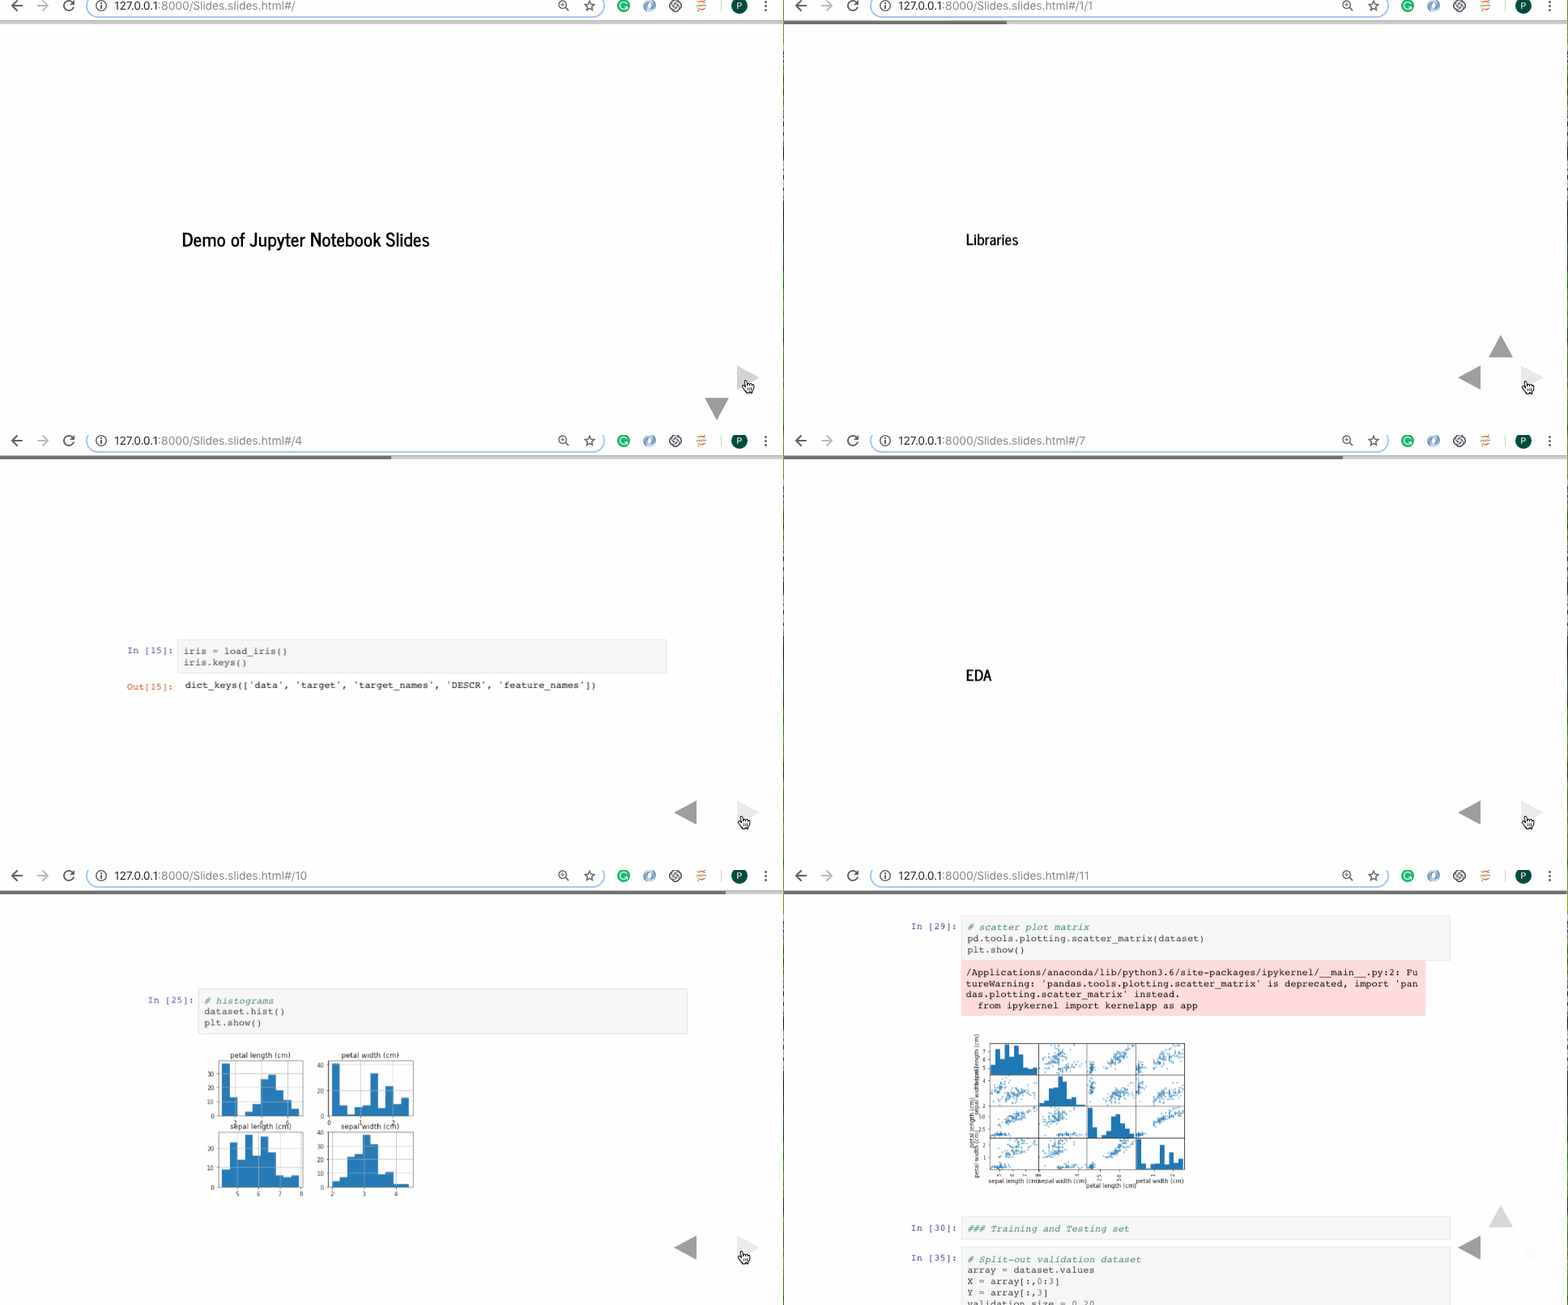
This would look even more classy with a themed background. Let us apply the theme ’onedork’ to the notebook and then convert it into a slideshow.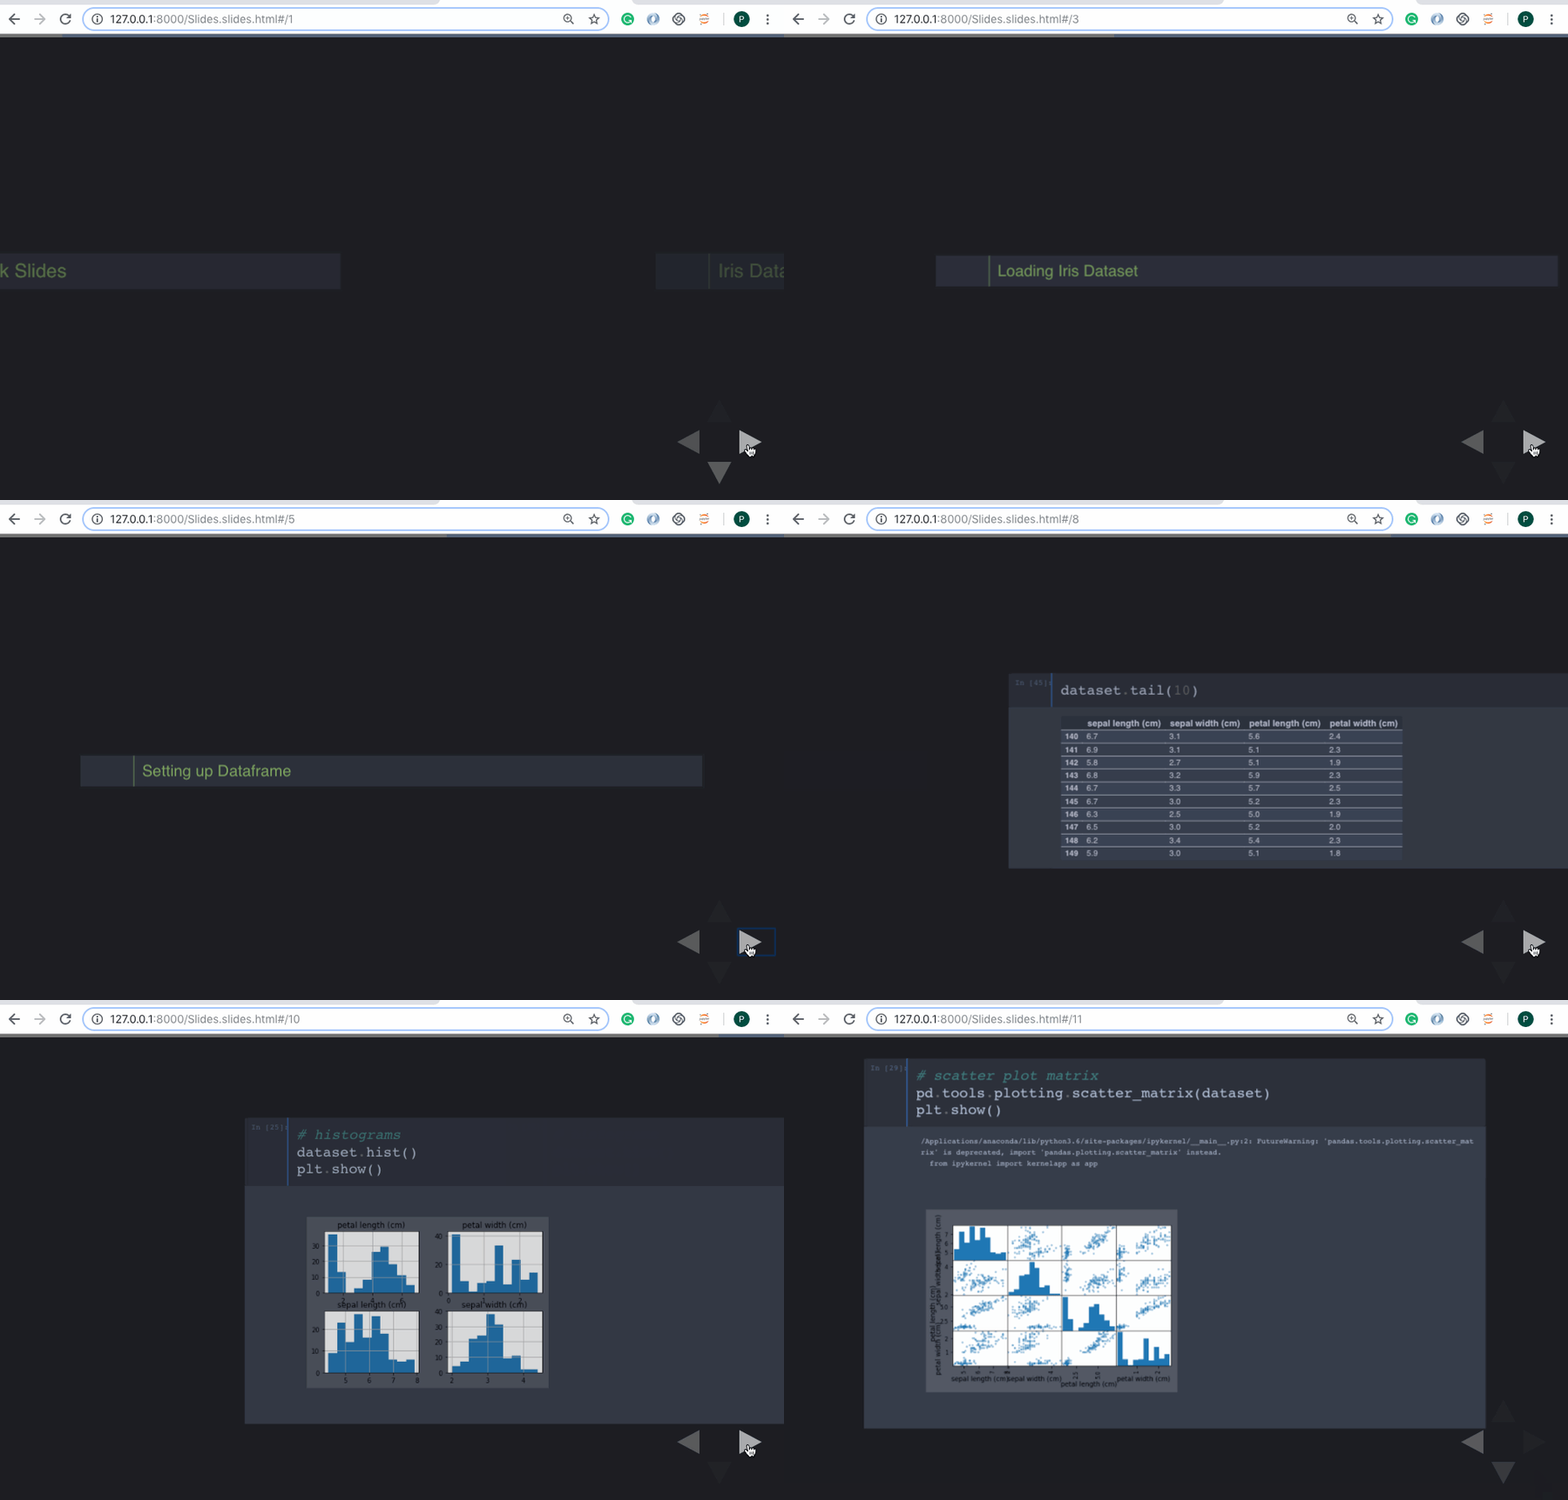
These slides have a drawback i.e. you can see the code but cannot edit it. RISE plugin offers a solution.
2. Using the RISE plugin
RISE is an acronym for Reveal.js — Jupyter/IPython Slideshow Extension. It utilized the reveal.js to run the slideshow. This is super useful since it also gives the ability to run the code without having to exit the slideshow.
Installation
1 — Using conda (recommended):
2 — Using pip (less recommended):
and then two more steps to install the JS and CSS in the proper places:
Let us now use RISE for the interactive slideshow. We shall re-open the Jupyter Notebook we created earlier. Now we notice a new extension that says “Enter/Exit RISE Slideshow.”
Click on it, and you are good to go. Welcome to the world of interactive slides.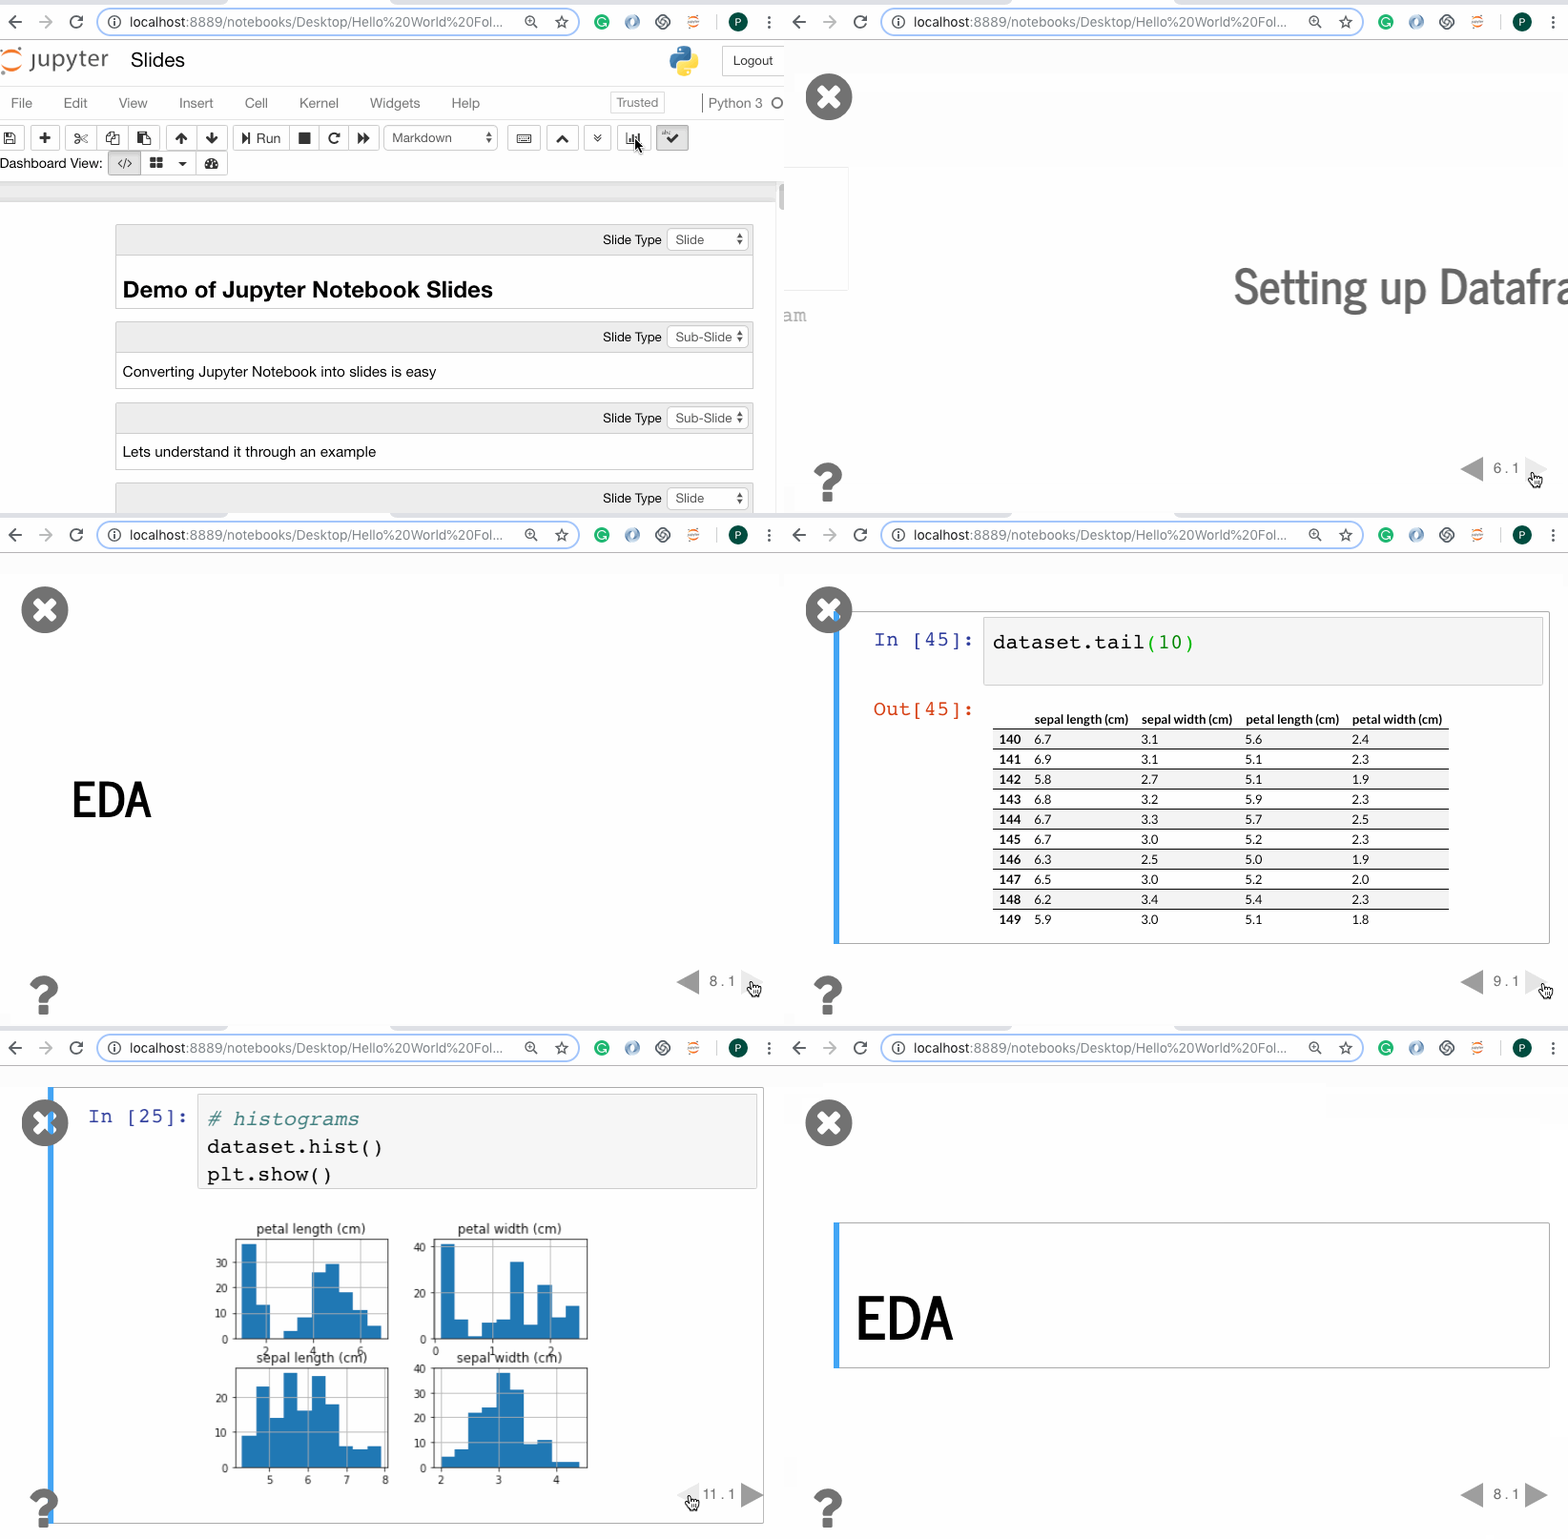
Refer to the documentation for more information.
6. Embedding URLs, PDFs, and Youtube Videos
Display it right there!
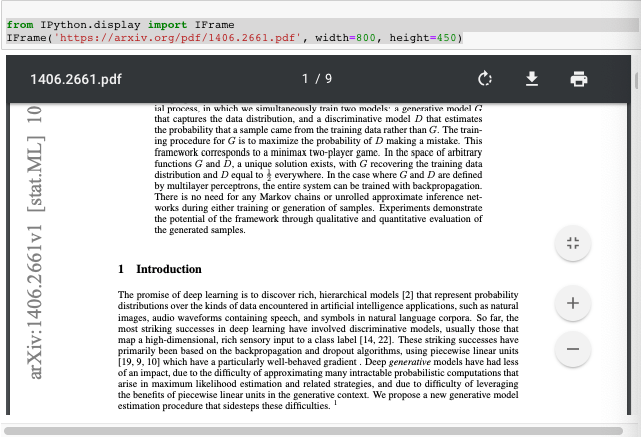
Why go with mere links when you can easily embed an URL, pdf, and videos into your Jupyter Notebooks using IPython’s display module.
URLs

PDFs
Youtube Videos

Drag'n'Drop Pivot Tables and Charts
To use PivotTable.js from Jupyter, first install it with pip install pivottablejs.
Then, if you have a Pandas DataFrame (from Pandas v0.14+, or any other object with a to_csv method which returns a string) called df just execute
and you will get an interactive UI in your notebook.
What happens behind the scenes is that a local file called pivottablejs.html is written (overrideable behaviour with the outfile_path keyword arg), which contains your data in CSV form and some HTML/Javascript to load up the UI, which Jupyter then loads up in an iframe. You can also “pop out” of that frame into a full page, which is then saveable for later.
The pivottablejs Python module is available from PyPi under the same free MIT license as PivotTable.js. The source is up on Github and I’d love feedback, pull requests etc.
Last updated